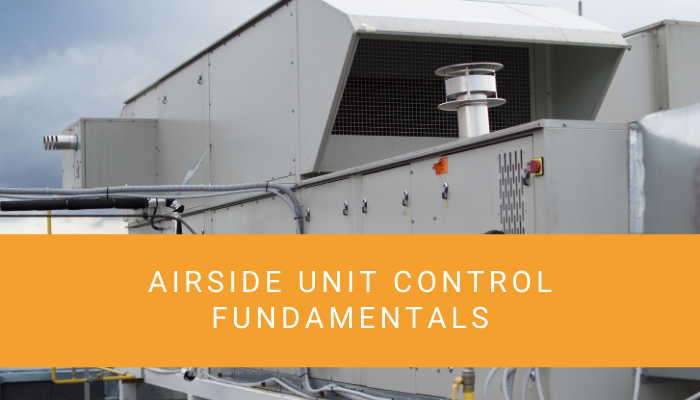

Hey folks, Phil Zito here and welcome back! In this post, we’re going to be continuing our series on HVAC sequences. Now, in the previous two posts, we went through Space Control and we went through simple Rooftop Unit Control.
Short on Time Listen to the Audio Instead of Reading
Today we are going to begin to look at some sequences related to air-handler systems. We're going to be covering Constant Volume Systems, VAV systems, Makeup Air Units, and 100% Outdoor Air Units.
So before we dive in, I want to remind you that this post is sponsored by our Control Sequence Fundamentals course. If you are looking to learn everything you need to know about HVAC, in order to work in the field of building automation, then you definitely need to check out this course.
A lot of folks think you need to spend time as a mechanic and doing a lot of work in HVAC, but that simply is not the case. I've talked to company after company, where they're looking to hire folks with IT backgrounds and electrical backgrounds to do controls work, and then they provide some minor training around HVAC so that folks know what to do in regards to programming and troubleshooting the control systems. That is what Control Sequence Fundamentals teaches you. It teaches you how to control HVAC systems.
Find out more about this course and how it can advance your career by clicking the link above.
Alright, let's dive in. So far on our journey here, we covered space control and the different variables we control within the space. Then from there we moved into fan coil units, rooftop units, which are more so unitary systems, meaning they typically will be self-enclosed, essentially controlling their own cooling, their own heating and typically controlling to a single space.
Air-Handling Systems
We're now moving into air-handling systems. These systems tend to serve multiple zones, and how they do that is either by providing constant volume air flow to the zones or spaces, and then varying the discharge air temperature, or by providing a constant discharge air temperature, and then varying the airflow, as we saw in the first part of this series on VAV boxes.
Single Path Constant Volume Unit
So let's take a look at the single-path air-handling unit (AHU) constant volume.
So, single zone VAV constant volume AHU. Alright, so whenever we are working with a constant volume system, I don't even know why folks call these sequence VAV units because technically it should be CAV, Constant Air Volume, unit.
Whenever we are looking at a single path air handler, whether it be a variable air volume air handler, whether it be 100% outdoor air unit, whether it be a makeup air unit, we're going to run into some common safeties. The most common of those are going to be fan safeties, and they are going to be smoke-control safeties and low temperature cutout safeties as well. I’m going to walk through some of the points and some of the things we're going to see in the systems.
Our primary objective with air handling units is moving the air volume because we use airflow to change temperature and humidity. Remember, our primary variable in all airside control is airflow. A lot of folks will say it's temperature or humidity. Some folks will even say CO2, but none of that matters if we controlling the airflow. You can control temperature to the nth degree, but if you can't get the air into the space, none of that matters.
For those of you who are troubleshooting, or programming, you really have to have your airflow down because if you don't have that, you cannot change the environmental quality of a space. I really want that to sink in. I see a lot of folks who will spend a lot of time troubleshooting temperature and humidity and not even look at airflow. Then they’re like, “Hey, I can't control the space.” Well, the space is designed for 1000 CFM, and you're giving it 500 CFM. Of course, you're not gonna control the space, it's not gonna happen.
Safeties
So, a single path air handler constant volume, is going to have fan safeties just like an actual air handler VAV, and this throws a lot of people because they ask, “Why do we have high static and low static for a fan, if it's a constant volume fan?” Well, that's because downstream effects on that system can affect the fan and cause over-pressurization or under-pressurization issues.
Over-pressurization is where there's some form of blockage, maybe from smoke dampers, or maybe someone commanded all the constant air volume VAV’s closed. Because of that, we are now seeing that this fan is starting to get too much static pressure on its discharge side of the fan and that causes over-pressurization. At that point, you should have a high-static pressure switch that will trip and will break the fan control circuit.
When I say break the circuit, I mean that you're running a control signal through this high static and it's typically a normally closed, and if that triggers it's going to open up, causing the fan to turn off. This is the same for low static, as well, basically the exact same wiring. In addition to this, we will typically have low temp alarms and smoke alarms.
Low Temp safeties exist so that we don't freeze any coils. In the case of a low-temp safety trip we'll shut dampers, open up return air dampers because remember, on single path, mixed-air air handlers, not 100% outdoor air, we can close off the outdoor air damper and open up the return air damper and still maintain enough airflow in order to properly run the unit.
We also have smoke safeties and fire alarm safeties, which are typically secondary monitoring. Those safeties will typically report back to the fire alarm panel. We will typically have an auxiliary output off of that sensor, or an auxiliary contact, that we are running our wires through for our safety circuit. We call it the safety circuit and you often see it on controls diagrams, where the actual design submittal will have all of these different coils and/or contacts that are going to be energized by safeties and you're going to see your control signal passing through that.
Discharge Air Temperature Control
Now when we're dealing with single path, constant air volume, we are really focused on manipulating discharge air temperature typically off of a reset. Sometimes we're using a trim-in response sequence and sometimes we're just using an average of space(s) temperature and we're throwing out any wonky values of space temperature. For example, if the space is 140 degrees, well, obviously, the space is probably not going to be 140 degrees. It's probably a bad sensor, so we're going to throw that out.
What we'll do is, we'll average the space temp and then we'll reset discharge air temp, and that is how we control discharge air temp for the spaces. We essentially are doing a demand-based reset, that's what it's called. Now we utilize this because when we're using constant air volume systems, we're not typically trying to hit a 55 degrees setpoint, which is commonly the point of saturation, and then allowing the air to mix once it actually gets the space. We want to go and provide a constant volume of air, and we’re hoping to control discharge air, and sometimes even humidity, at a constant volume unit.
Heating and Cooling
When we're dealing with these types of units we’ll typically have cooling and reheat. Sometimes we will not see reheat on a mixed air, single-path variable air volume air handler, because we will depend on the terminal units downstream to do reheat, at the space and zone level. However, when we're dealing with a single path, constant air volume, we are typically varying our discharge air based on space reset, and so we typically will have some form of reheat as well. That reheat will typically be used both for dehumidification sequences as well as just for controlling discharge air.
Like I said, we'll talk about those sequences shortly. We also, typically, will have cooling valves or DX cooling along with low-limit sequencing, and we'll cover that in a second. Finally, we will have outdoor air dampers and return air dampers typically controlling the economizer and potentially CO2 controlling via a CO2 sensor or via just using our ASHRAE 62.1 settings.
Okay, so let's discuss a sequence which I will italicize.
The Temperature sensor will determine if the unit is in heating, cooling, or ventilation mode during occupied operation.
We can see that occupied operation will be determined via several different things:
Occupancy will be determined via an occupancy schedule, forced occupancy override, push button override on the space sensor, or an external schedule device.
What we're going to do here is we will have three kind of “modes”. As far as occupancy goes, we'll have:
The system shall have three occupancy modes:
- Unoccupied
- Occupied
- Off
There's an important reason we have “off.” If you're doing maintenance, you don't want to have the unit in unoccupied mode, you want to have it in off. This is really important because of unacknowledged alarms and all sorts of effects it may have on other sequences. I highly recommend if you're programming any HVAC system that you have some form of maintenance mode where you disable alarms so you can work on the system and not trigger the slew alarms, causing all sorts of issues.
Okay, so we have our three occupancy modes. Within our occupancy mode of occupied we have:
The unit shall have three temperature control modes
- Heating
- Cooling
- Ventilation
Let's take a look at each these.
Cooling And Heating Mode
Cooling mode, is pretty straightforward.
Cooling shall be enabled by an enable setpoint
Basically the sequence wants us to look at our discharge air temp setpoint , known as x, and we've gone above it by y, that indicates a need for cooling modes enabled. Then the cooling mode sequence will start to operate, and we're either going to turn on compressors or cooling coils, and open those up and control to our supply, or discharge air temp, whatever it's called.
Coils are pretty straightforward. You use a PID loop, you set your integral and your proportional gains so that it properly controls, and then you control the output to the cooling valve. Now if the unit is using compressors instead of coils, then you're going to take your PID output and feed that into a sequencer block.
Now, some programming software will allow you to directly connect your setpoint and process variable to a sequencer block. I personally prefer being able to control via a PID loop and then feeding into a sequencer block which uses min and max runtime and stage delays.
There’s pros and cons to both approaches.
If you're using a PID loop and you're feeding it into a sequencer block, the cons of that are that your PID loop, if it's self-tuning, can get a little bit out of whack because of the and on and offs and your minimum runtimes and maximum runtimes of your sequencer block.
This means your stages of your compressors can stay on for a certain amount of time and the PID loop may be calling it to be off and it's like, “What the heck,” and it spins up or winds down, and you have some issues. This can be counteracted by lowering the I value of your PID loop.
On the flip side, if you use a sequencer block, what can happen is that you will not have granularity of control. Once you hit that 50% threshold, that sequencer block is going to come on. There's a variety of different ways, but I don't want to get too much into the sequence of programming here. Either one works; PID into a sequencer block, or just directly controlling into a sequencer block.
For those of you who are like, “What the heck did Phil write? That makes no sense!” I encourage you to go check out our Ultimate Guide to BAS Programming where it walks through sequencer blocks and PID loops and things like that.
Now we move into heating mode. So we drop below discharge air setpoint where we're getting too cold and we're discharging cold air. We don't want our space to get too cold, so the first thing that would happen is our space reset. We would see our space is getting cold and it would reset our discharge air temp up. What will happen is eventually, we're going to stay below discharge air temp setpoint and we're going to have to turn on the heat.
This is where we start to turn on a variety of different heat types, either gas heat, hot water heat, electric heat, or SCR heat. There's a variety of different types of heat, but the important question to ask is how am I controlling my heat?
I can use PID Loop control to control hot water valves and SCR, which basically is variable electrical heat. Or I can control a gas or staged electric heat command with a Boolean output.
Now in the case of Boolean commands, you're just using a simple comparator. If I'm above x, I turn on y. So from there, we have our heat. We've got heat, we've got cooling, but then we have this thing called ventilation.
Ventilation Mode
What is the purpose of ventilation?
Well, sometimes you've met your setpoint, which is great, right? You're hitting 65 degree discharge air using economizer. Everything's all well and good, but you still need airflow and that is where ventilation mode comes in.
Ventilation mode simply circulates airflow in order to provide airflow to the space as needed, or spaces as needed. So it's important to realize that when you're not in cooling mode and not in heating mode, you still want to have ventilation mode going. If you don't have ventilation, if you don't have airflow, then you're not going to satisfy ASHRAE 62.1. The space air is going to get stagnant, people are going to start to get tired, and you can actually make people quite sick if you aren't removing CO2 and things like that.
Depending on your building envelope and how well sealed it is, and how well your pressurization strategy goes, you can actually fill a space with really bad air because at the end of the day, air, just like water, has mass and volume and will fill a space. Air is actually an object and a lot of folks don't realize this. They think, “Water, obviously an object; steam, obviously an object because it has mass.”
But air has mass as well. Air may be, much less dense than water, but it still has mass and it can fill up a space, and so we need to make sure that we have airflow constantly in order to keep an optimal environment for our occupants.
Economizer Mode
From there, we have an economizer mode. Now, we have various different ways of controlling economizer. That being said a nutshell, economizer serves two purposes.
The first purpose is free-cooling. And before I dig into this, I want to take a brief segue to cover moisture content because some people don’t understand psychometrics, or, moisture content in the air. The reason why is, oftentimes folks who are new to this field, they'll say, “It’s 65 degrees outside, so I'm gonna control temperature with economizers.” Great, awesome, free cooling, right?
The thing they don't consider is what is the relative humidity at 65 degrees? What if it is 90% relative humidity? I know those are some crazy numbers, but what you have to realize is as temperature increases, the effect of relative humidity is massive.
The amount of moisture, measured in grains of moisture per pound of air, at 55 degrees with 100% relative humidity is completely different than 90 degrees and 90% relative humidity. So, as air gets hotter, it can store more moisture in it, and 90 degrees with 90% relative humidity is a much larger amount of moisture.
The problem with this is, one, it impacts the ability for the evaporative effect. When air blows across a human body, the evaporative effect removes moisture off the skin of the body, which causes people to feel cool, (side note I am describing the evaporative effect in very simple terms, there is much more to it) It is also the reason why your skin can start to dry out if the humidity level is too low causing your skin to chap because too much moisture is being removed from your body.
Ideally, we're in the 40% to 60% relative humidity range to maximize the evaporative effect while still maintaining comfort.
However, the issue is that when we introduce 90% relative humidity and hot temperatures, there is a ton of moisture that has to be removed by the system and the only way the air-handling system can remove moisture is to bring the temperature to saturation. This basically means that we cool the temperature down to the point where, as temperature lowers, it has less capability of holding moisture and as the temperature gets lower, that moisture is going to condense and leave the air stream because it can simply no longer be held and contained by that air at a colder temperature.
When we're dealing with an economizer, what happens here is a lot of folks will initially focus on what's called dry bulb temperature, which does not account for humidity. That's all well and good, in some climates, but if you're in the deep south of the US, that's not good because there's a lot of humidity. With that humidity, you are introducing moisture into the system that cannot be removed by the system, which starts to heat up and make the spaces feel muggy.
Commonly when we're dealing with economizer control, we're going to look at dry bulb, which is just pure outdoor air temperature, and we will have an enable setpoint. Then we're going to let economizer control to discharge air temp and if it doesn't meet discharge air temp, we're going to just shut it back down to minimum position and start to enable the cooling coil.
With some systems, we'll actually look at enthalpy, which factors in the relative humidity of the air and the moisture content of the air. By doing that, we'll make a decision, is the return air stream more humid and more moist than the outdoor air air stream. If it is, then we're going to close down that return air stream and we're going to utilize the outdoor air air stream because the mechanical effort of our system to remove that moisture is going to be lessened.
So that's it for using an economizer to control cooling.
Demand Ventilation
But we also have CO2 control. So ASHRAE 62.1 defines the amount of fresh air required within a space based on space type and occupancy count. ASHRAE 62.1 states that we can utilize a CO2 sensor to measure return air or space CO2 and use that value to control our economizer position in lieu of a minimum damper position.
Now on constant air volume systems, where the air volume is constant and the fan’s at a constant speed, we can set a minimum damper position for the minimum ventilation required by ASHRAE 62.1. We can do this because we always know how much air we're going to be pulling in via the air stream because we have a constant volume of air.
When we're using variable air volume systems, that's where things get a little weird and why we tend to have to use air flow stations in order to properly control minimum outside air flow. To be clear anyone who's telling you that by using a command of 10% at the minimum outdoor air damper position you're actually controlling to ASHRAE 62.1, is really not giving you proper information. As you start to vary the speed of the air being drawn by those fans, you actually are affecting the amount of air that's going to be coming through those dampers and the mixture accordingly.
Variable Air Volume
Alright, so with that being said, that kind of takes us through this constant air volume air handler. Let's now look at the variable air volume because there's really not too many differences.
Discharge Air Pressure Control
So the biggest difference of a variable air volume system is utilizing a Variable Speed Drive (VSD) or Variable Frequency Drive (VFD). So a VSD varies the speed of the fan whereas, a VFD varies the frequency of the electrical signal, and that's how it controls the speed of the fan. Those are two of the most common ways of controlling a fan for a variable air volume unit. While they are different they ultimately achieve the same goal which is modulating the air volume being provided to control to a discharge air pressure setpoint.
The discharge air pressure setpoint is anywhere between one to three inches water column, that's how we measure discharge air pressure.
How that discharge air pressure is affected is, when a VAV box downstream from the VAV air-handling unit closes or opens up, the air volume in the duct work changes causing the air pressure of the duct to change.
The air handler will be monitoring the discharge air pressure and discharge area pressure setpoint, and will vary the fan speed accordingly, in order to basically provide the proper amount of air volume to these VAV units.
Discharge Air Pressure Reset
In some cases sequences will require the discharge air pressure setpoint to be reset.
Now there's a couple little nuances here. Some folks will look at the average damper position and will simply do a scaled reset across a preset range for the discharge air pressure setpoint. That can work in some cases. But if you have constantly varying space dampers, you can see some oscillation of your PID loop, and PID loops for fans are very responsive therefore oscillation is quite bad.
To explain that last statement further, basically the effect of fan speed on discharge air is such that the effect of the output of a fan on the process variable, which is discharge air pressure, is really really quick. It's almost an immediate effect and is very interesting to watch. I look at discharge air pressure as having close to the same responsiveness as steam. With steam when you start to open up a steam valve, you have an almost immediate effect on discharge air temp, and it's the same with fan speed, and air volume, and discharge air pressure.
Because of this one of the approaches that folks will take is to use a trim and response sequence. Trim and response is where you're going to look at the average zones call for cooling, heating, or ventilation (it depends on who wrote the sequence). If the amount of calls for cooling, heating, or whatever the metric is exceeds a threshold for a specific amount of time then the pressure setpoint will be increased slightly. If the calls drop below a threshold for a specific amount of time the pressure setpoint will be lowered.
This is essentially a time based approach to scaling a setpoint.
This control mode is fairly common in advanced ASHRAE sequences. It's not something I particularly like because it makes it difficult to troubleshoot, and honestly, I've seen more folks mess it up than get it right. I think most folks would be better just picking a static discharge air pressure setpoint, especially here in the US where utility costs are so low.
I know that not doing a reset sequence slightly increases the wear and tear on the equipment and increases the utility costs of the equipment, but here in the US we can afford that. Overseas, maybe not so much. I will tell you though, I've seen more problems with reset sequences than I have seen with actual static discharge air pressure set points.
So with that being said, that pretty much takes us to the end of this post.
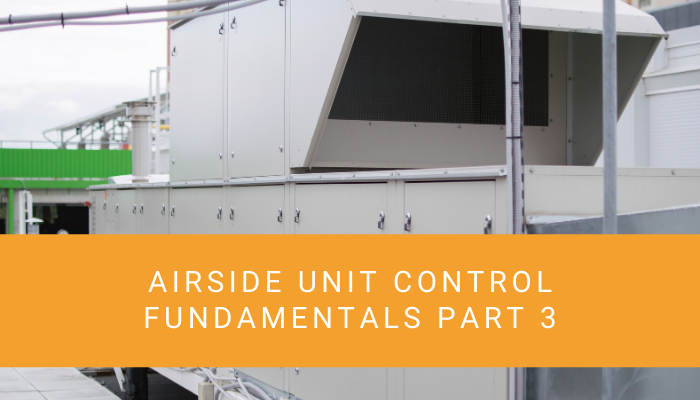
In next week's post, I'll pick up covering a little bit more about variable air volume mixed-air single path air handling units and then we'll walk through the 100% outdoor air units, and finally we'll walk through the makeup units. By that point, we should be through airside systems, and we'll be ready to move on to hydronic systems.
As always, if you have any questions, feel free to ask them in the section below. Be sure to also check out the links to our Control Sequence Fundamentals course.
With that being said, thanks so much. I look forward to seeing you again next week. Take care!